With Step-by-Step Screenshots
When you upload pictures to WordPress, resizing them first keeps your website fast, clean, and easy to load on phones.
The recommended maximum width is:
✔ 960 pixels wide
Below are beginner-friendly instructions with screenshots for each method.
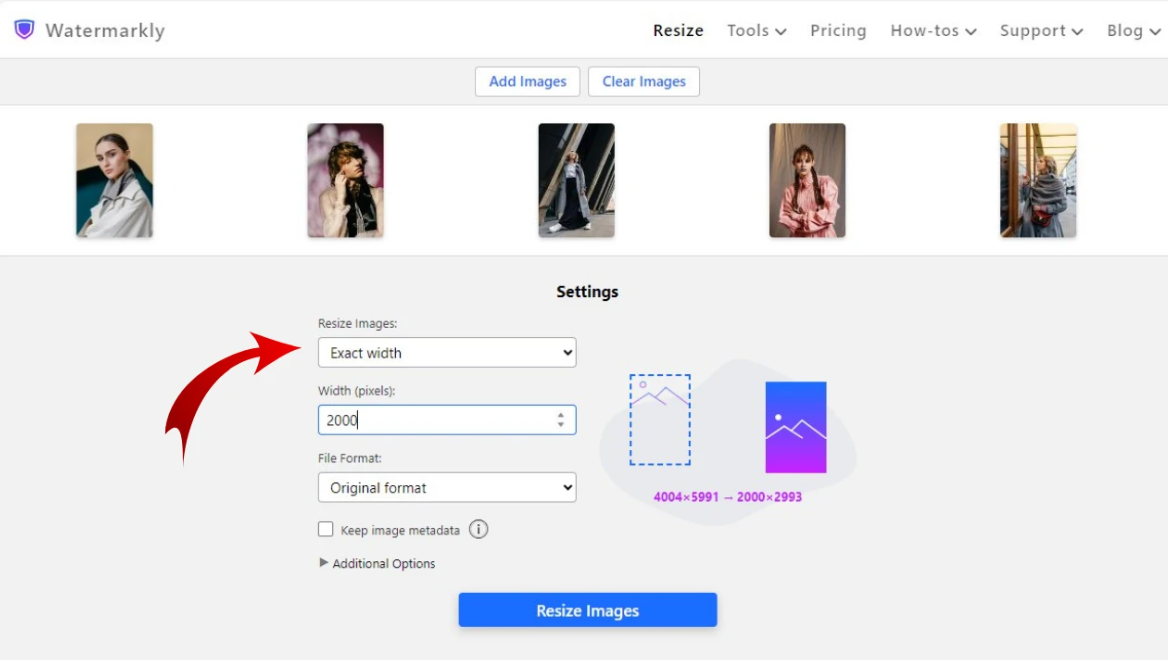
1. Resize Your Photo Using an Online Tool (Easiest Method)
Online resizers work on Mac, Windows, and Chromebook.
Recommended free tools:
-
imageresizer.com
-
picresize.com
-
iloveimg.com
Steps (with screenshots)

-
Go to one of the websites.
-
Click Upload Image.
-
Enter 960 in the width box (make sure “Keep Aspect Ratio” is ON).
-
Click Resize.
-
Click Download to save the new smaller file.
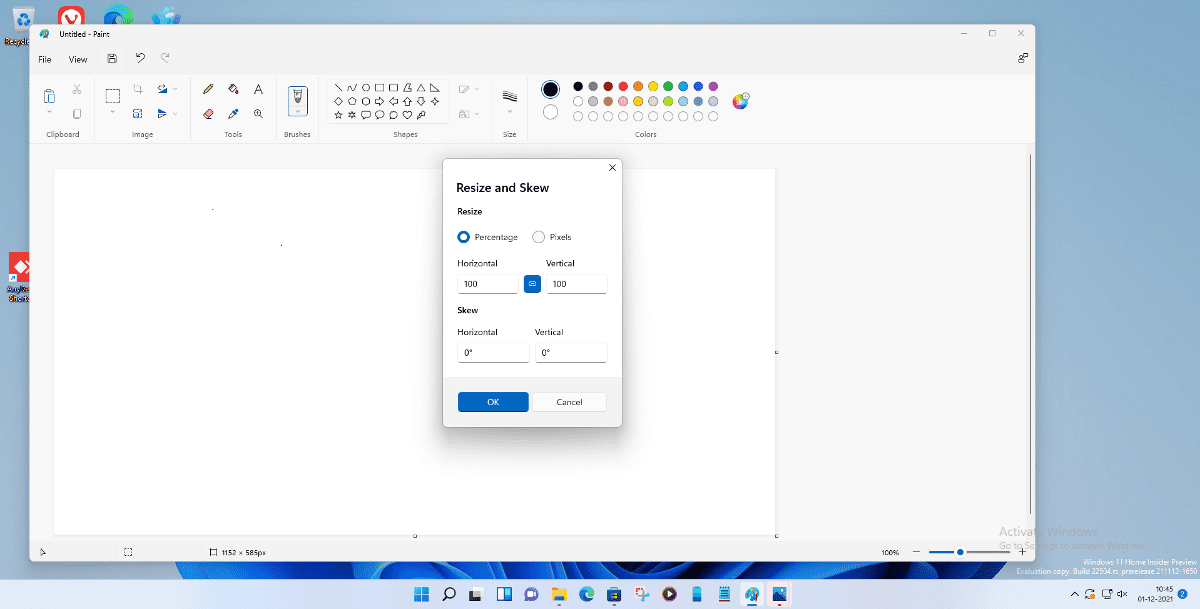
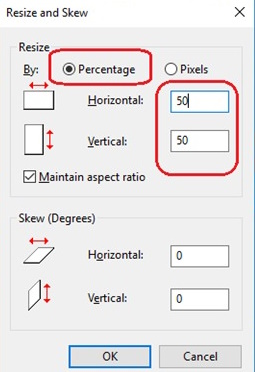
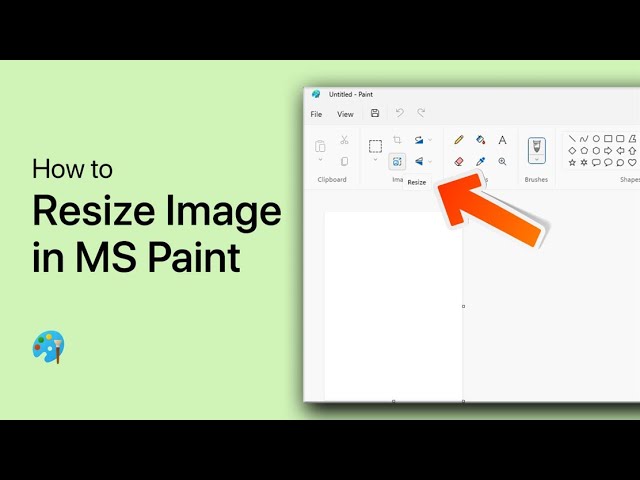
2. Resize a Photo on Windows Using Paint
Windows includes Paint, which is simple and fast for resizing.
Steps (with screenshots)
-
Right-click the photo → Open With → Paint.
-
Click Resize at the top.
-
Switch to Pixels.
-
Type 960 into the Horizontal width box.
-
Make sure Maintain aspect ratio is checked.
-
Go to File → Save As to save your resized copy.
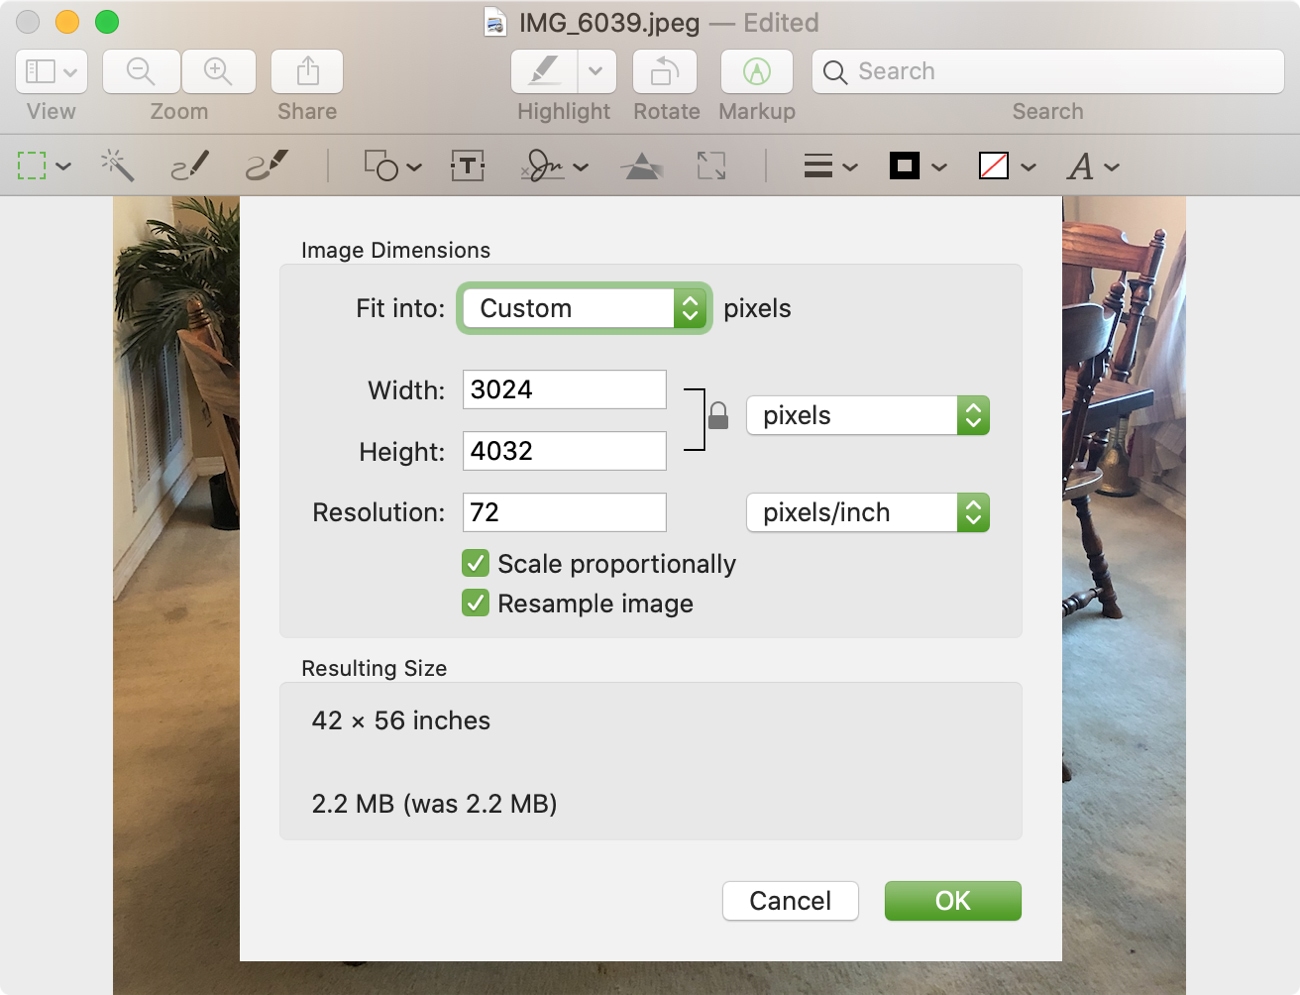
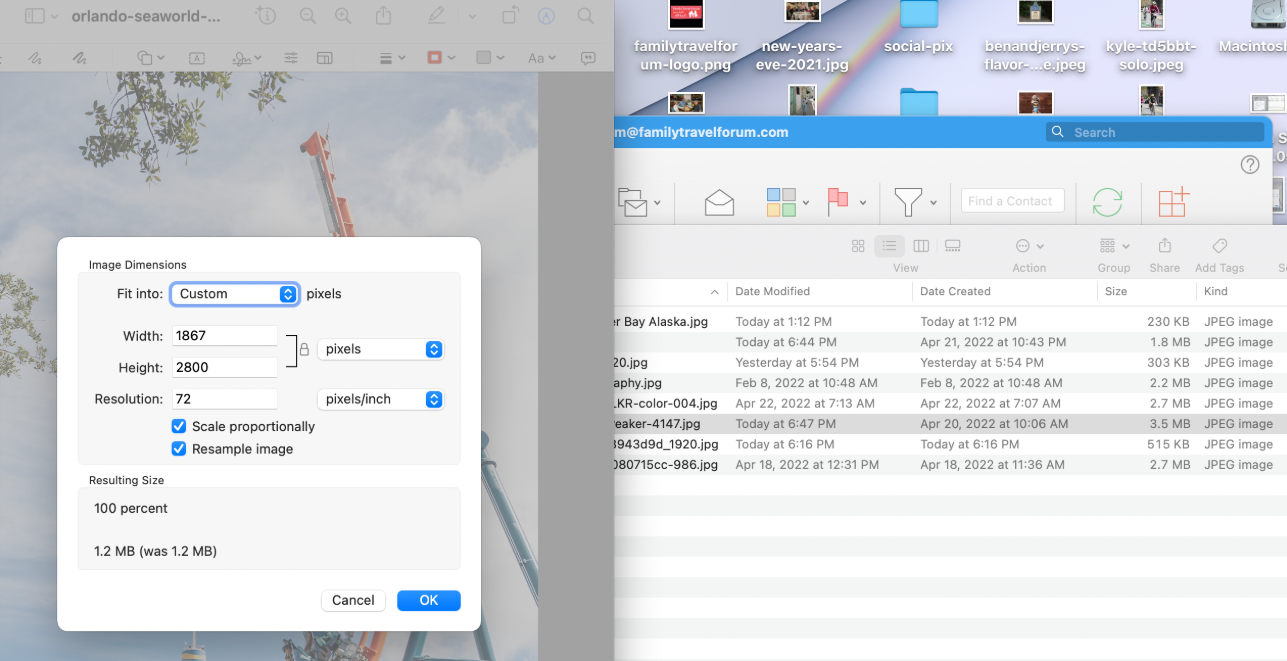
3. Resize a Photo on a Mac Using Preview
macOS includes Preview, which has an excellent resizing tool.
Steps (with screenshots)
-
Double-click your image to open in Preview.
-
Go to Tools → Adjust Size.
-
Make sure Scale proportionally is checked.
-
Enter 960 for width.
-
Click OK.
-
Go to File → Save As to save your resized version.
4. How to Name Your Resized Image for WordPress
Choose a simple, clean filename that matches your blog post title.
Example:
Post title: My Trip to Cannon Beach
File name: my-trip-to-cannon-beach.jpg
Here is a visual example:
This makes the image easier to find and improves SEO.
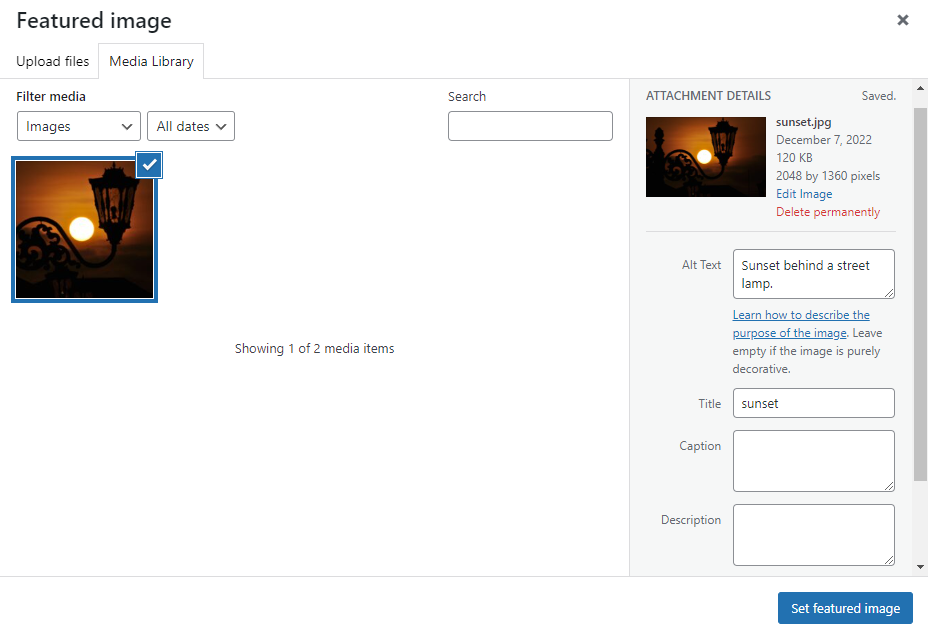
5. How to Upload the Image as a Featured Image in WordPress
Steps (with screenshots)
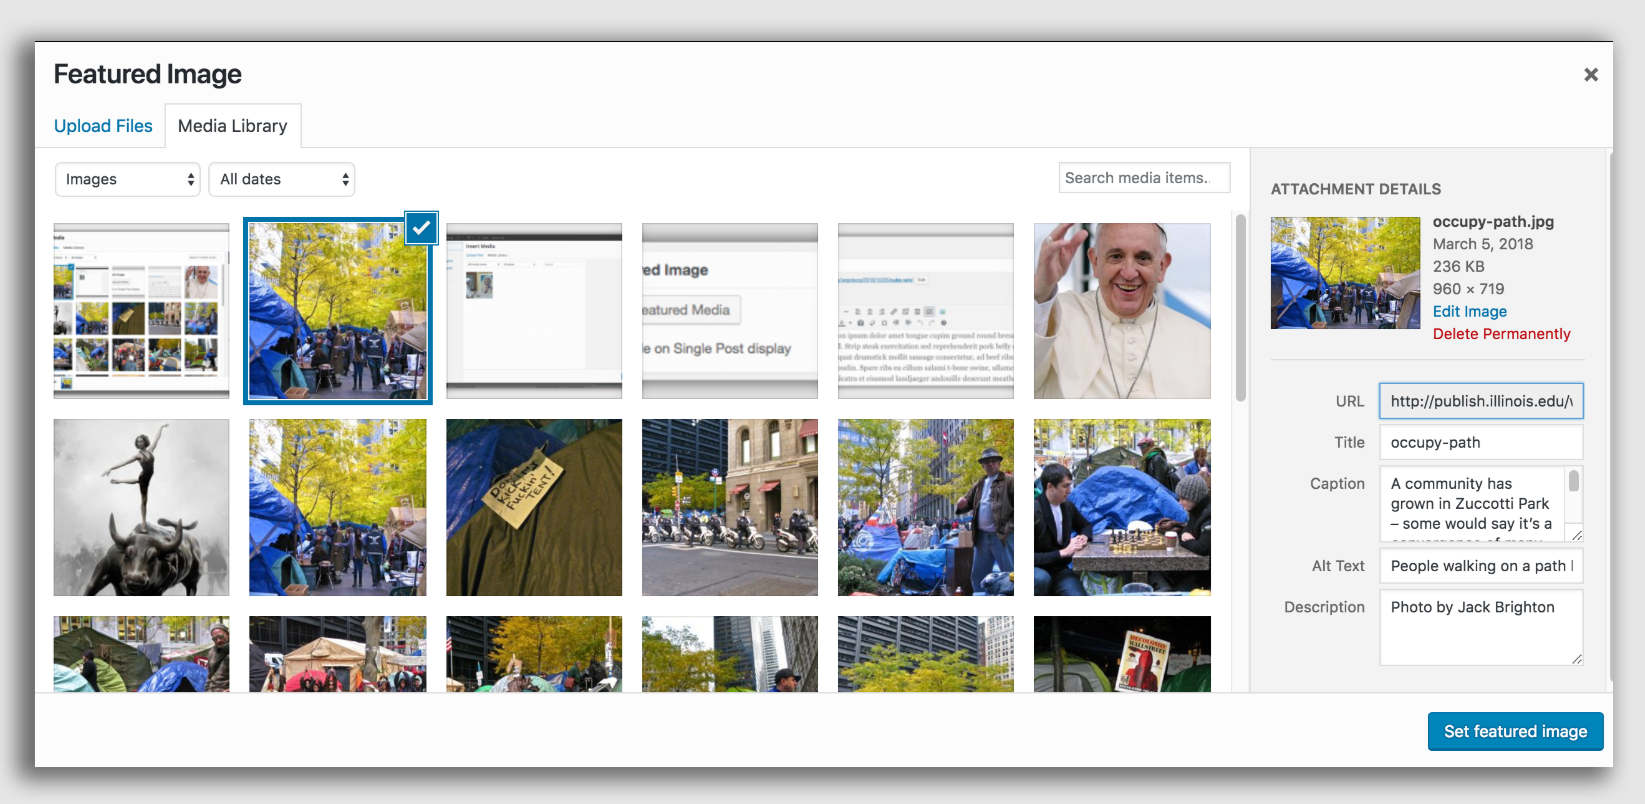
-
Open WordPress → Posts → Add New.
-
On the right, find Featured Image.
-
Click Set Featured Image.
-
In the Media Library window, click Upload Files.
-
Select your resized file.
-
Click Set Featured Image in the bottom right.
You will now see the image appear in the Featured Image box.
6. How to Insert the Image Inside Your Blog Post Body (Optional)

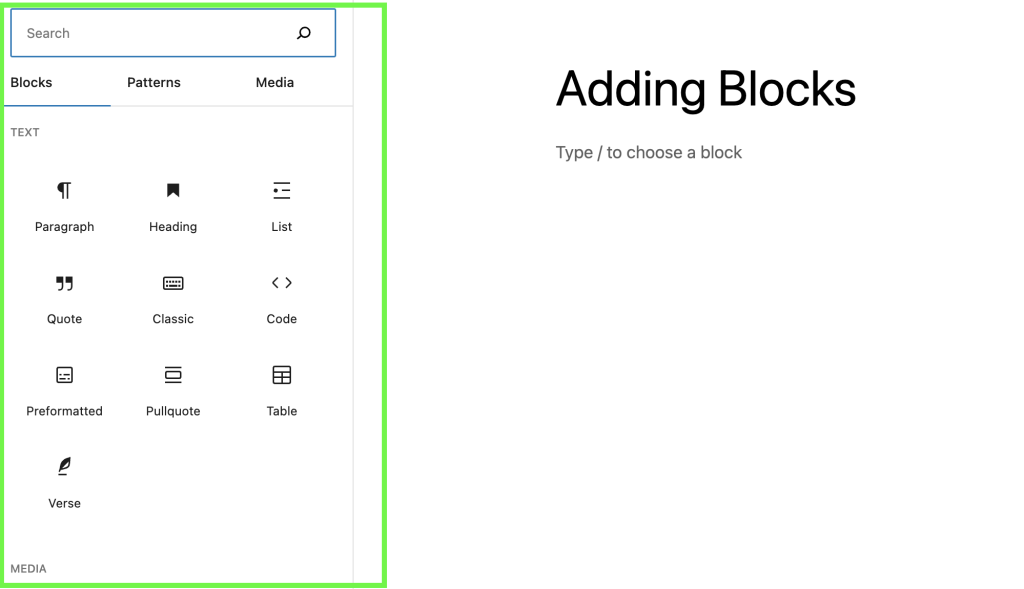
-
Click where you want the picture to appear.
-
Click the + to add a block.
-
Choose Image.
-
Upload or select your resized file.
Quick Checklist for Students
✔ Resize image to 960px wide
✔ Keep aspect ratio ON
✔ Save with blog-post-title.jpg
✔ Upload as Featured Image
✔ Insert in body (optional)